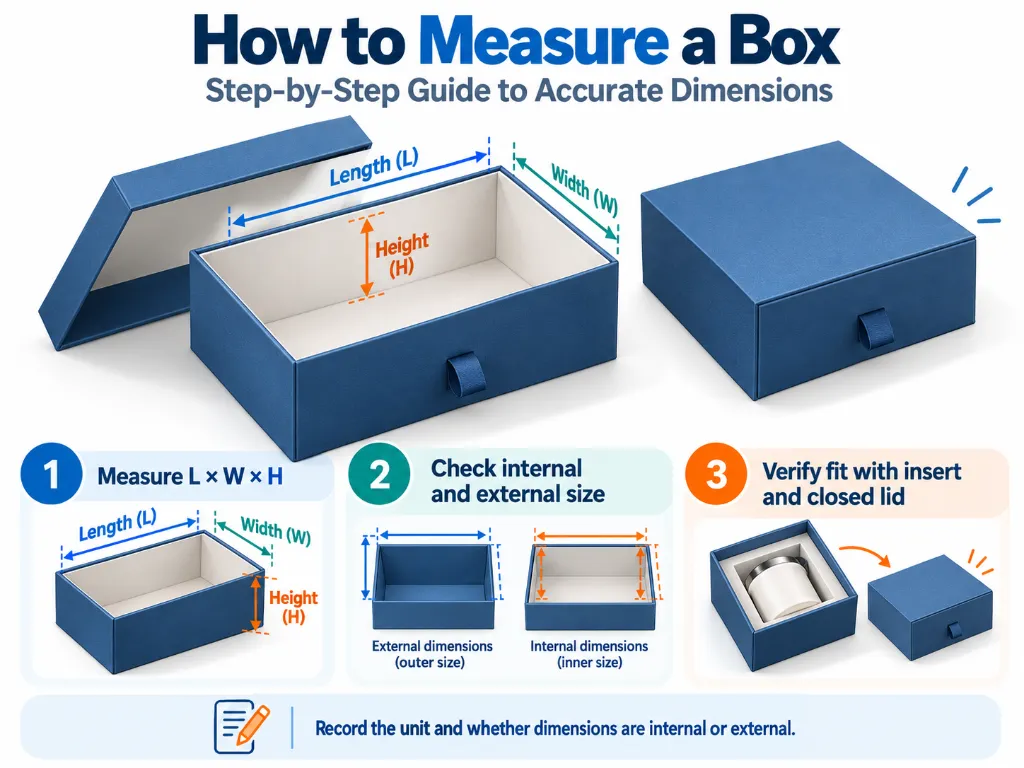
To measure a box, record its length × width × height (L × W × H), identify whether those numbers are internal or external, and include the unit. For a custom gift box or mailer, the measurements are not complete until you’ve checked the product with its insert and the lid fully closed.
A bottle may fit the open cavity but touch the lid. A drawer tray may be the right size on paper yet jam inside its sleeve. Both problems are easier to fix in a sample than after production.
How to Measure a Box Step by Step: Lunghezza, Larghezza, and Height
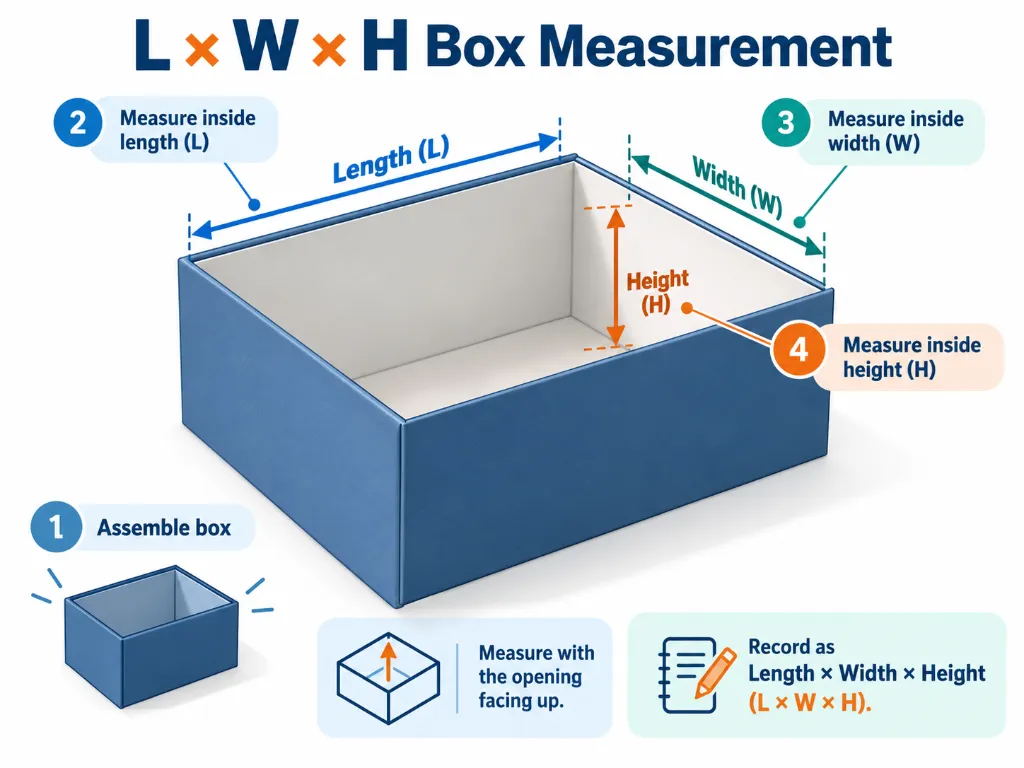
Use a rigid ruler or tape measure and place the assembled box on a level surface. For small custom cartons, a caliper can help check tighter details.
- Assemble the box fully. Square the corners and lock folding panels in place. Remove a loose insert if you’re measuring the box cavity.
- Measure internal length (L). With the opening facing up, measure the longer inside edge between the finished walls.
- Measure internal width (W). Measure the shorter inside edge on the same plane. Keep the ruler straight; don’t measure diagonally.
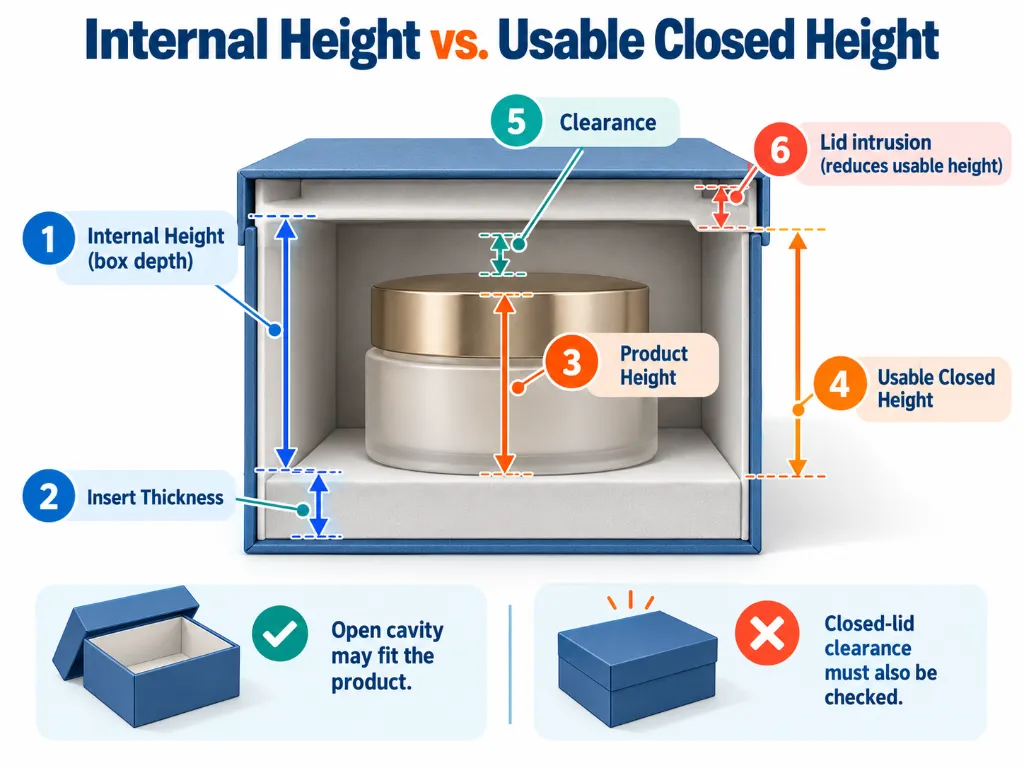
- Check both heights. Measure the box body’s inside depth from its finished base to the opening. Then close the lid and determine the usable closed height above the product area. A recessed lid, shoulder or internal flap may reduce it.
- Repeat and label. Check the dimensions in more than one position if a wall bows or the box is handmade. Record
L × W × H, the unit and the measurement type.
For the external size, close the box and measure its greatest overall length, width and height, including any projecting lid or closure. The dimension labels on the approved dieline take precedence for unusual opening directions; some box makers call the third dimension depth.
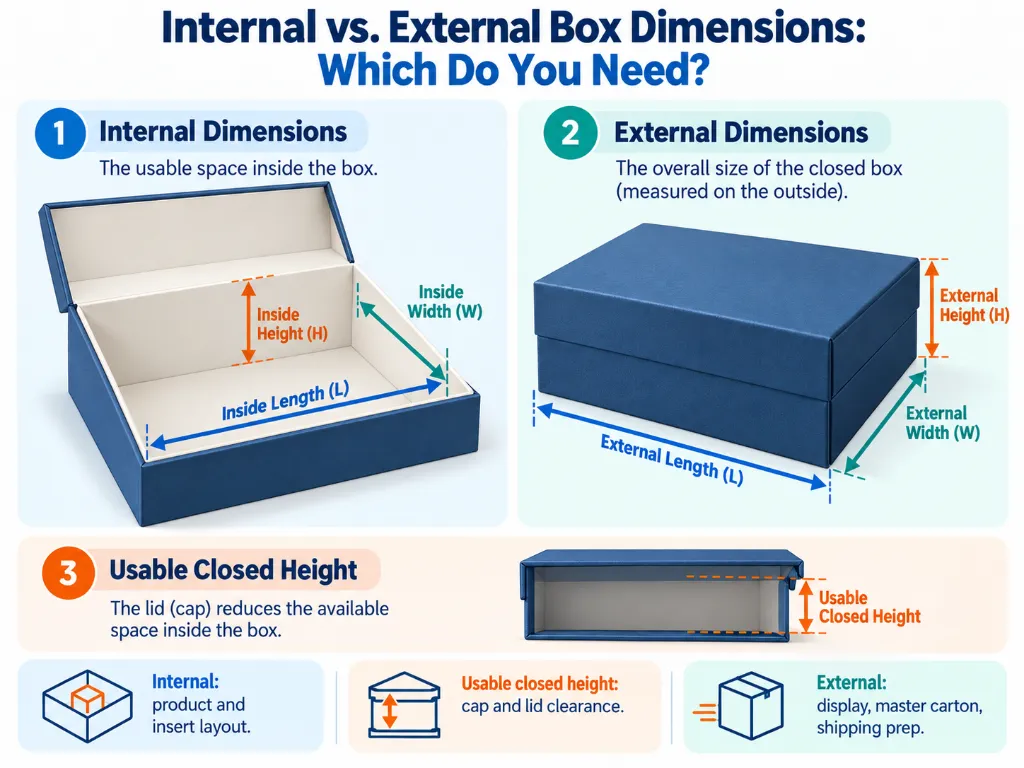
Internal vs. External Box Dimensions: Which Do You Need?
The answer depends on what you’re trying to fit or calculate.
| Measurement | What it means | Use it for |
|---|---|---|
| Internal dimensions | Clear space inside the assembled box body | Initial product and insert layout |
| Usable closed height | Space available with the lid shut | Checking cap, lid and product interference |
| Insert cavity dimensions | Finished space holding each item | Retention, packing and product removal |
| External dimensions | Maximum overall size of the closed box | Display, master-carton planning and shipping preparation |
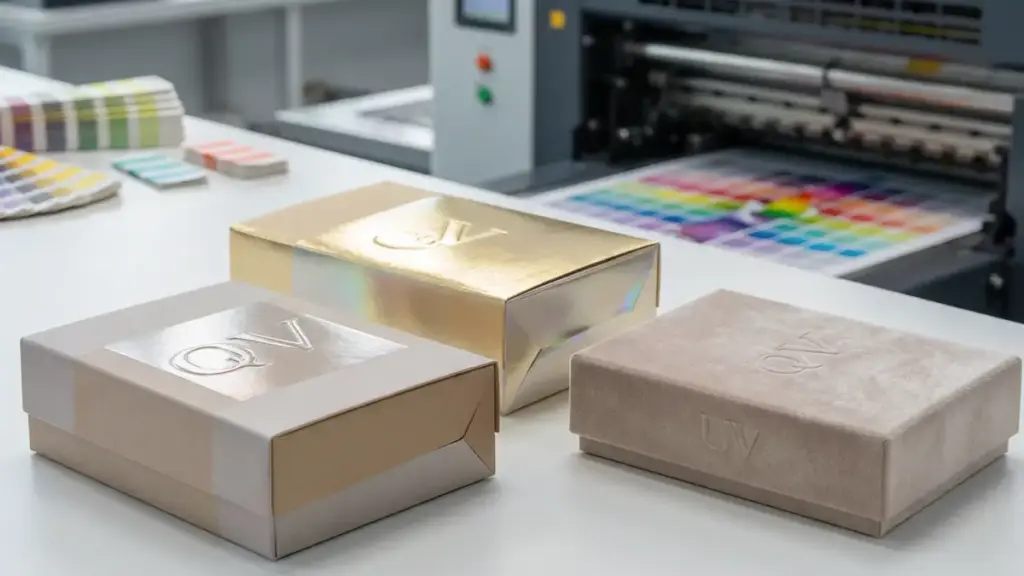
Rigid-box board, wrapping paper and lid overlaps affect the external size. Don’t calculate it by simply adding a fixed thickness to every internal dimension; verify the assembled sample.
Factory dimensions and shipping dimensions are not always labelled the same way
A tall display box might be specified by the factory as 120 × 80 × 200 mm (L × W × H), using the opening as the length–width plane. The same box may be recorded for shipping as 200 × 120 × 80 mm, because the carrier calls the longest outside edge the length. The physical box has not changed—only the axis convention.
For a parcel, measure the packed outer carton, not the gift box inside it. Include bulging panels or projecting components. IL UPS U.S. measurement guide explains longest-side measurement and rounding rules; Canada Post uses the greatest dimensions of the parcel. Australia Post publishes size and weight rules for its services.
Published shipping example: Canada Post shows that a 100 × 60 × 20 cm parcel has 120,000 cm³ of volume. Under its Xpresspost example, dividing by 5,000 gives a volumetric equivalent of 24, even when actual weight is only 8 kg. Vedere Canada Post’s worked examples. It illustrates why accurate outside measurements matter; it is not a recommended box size.
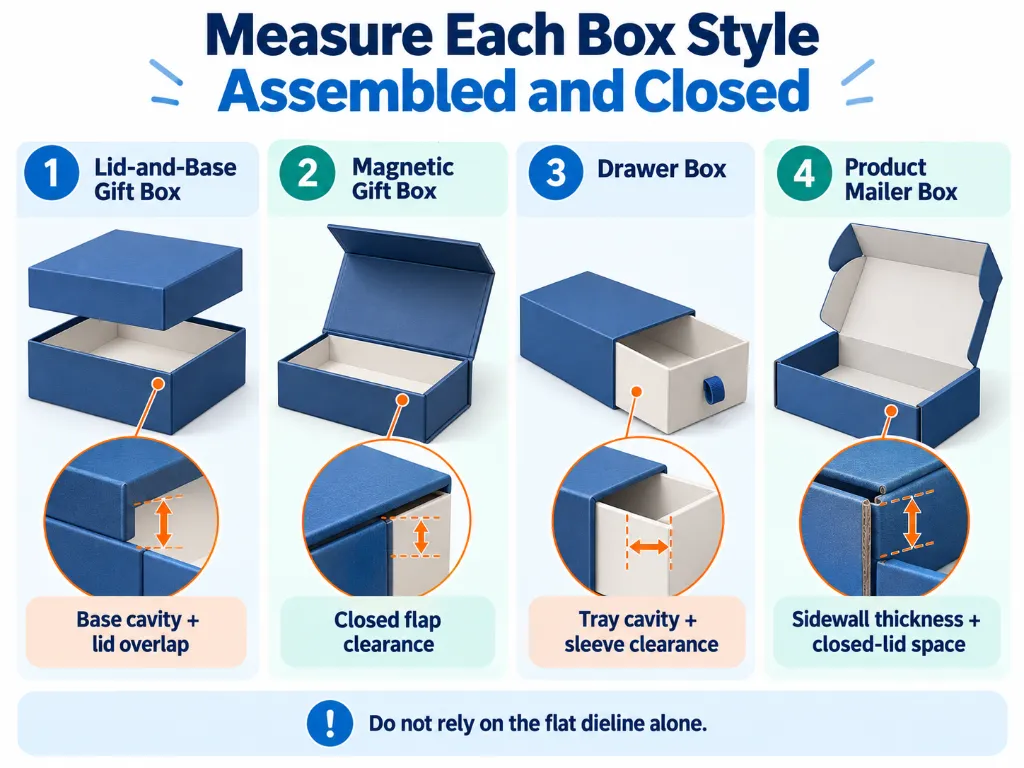
How to Measure Gift Boxes and Mailer Boxes Correctly
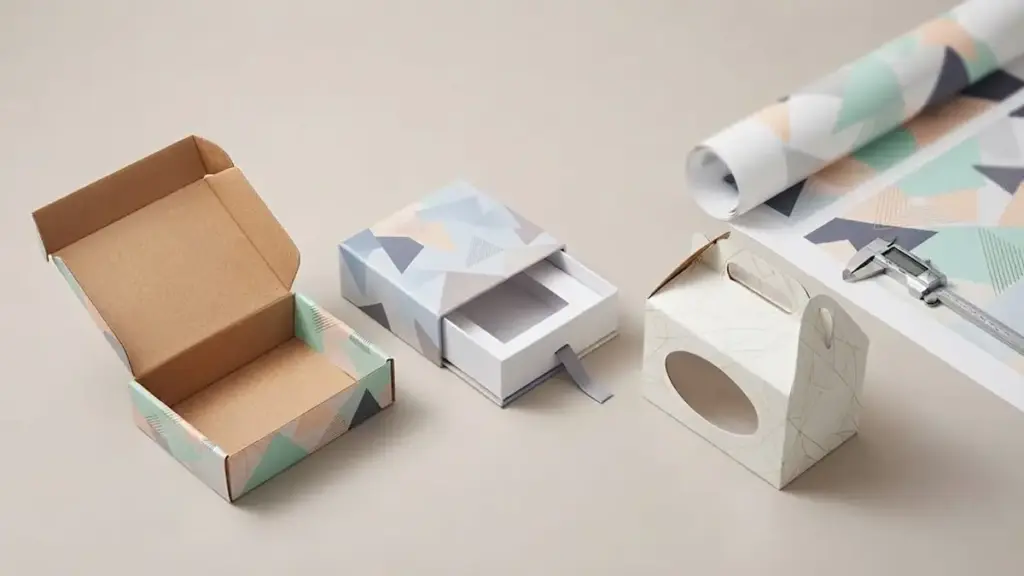
Measure each style assembled and closed, not just from a flat dieline.
| Box style | Critical measurement check |
|---|---|
| Lid-and-base gift box | Base cavity, lid overlap and usable height with the lid on |
| Magnetic gift box | Clearance under the closed flap and around magnetic/shoulder structures |
| Drawer box | Inner tray cavity, tray outside size and sliding clearance within the sleeve |
| Corrugated mailer box | Folded sidewall thickness, locking tabs, insert space and clearance under the closed lid |
A lid-and-base rigid box and a drawer box may share nominal dimensions but behave differently when packed. You can compare these constructions in PackCCP’s rigid box collection.
How Much Space Should You Allow for Products and Inserts?
Start with the actual product, including its cap, pump, handle, sleeve or accessories. For a multi-item gift set, measure the entire arranged layout, not each item in isolation.
Account for three things:
- Insert thickness: platforms, partitions, folded supports and cavity walls occupy space.
- Working clearance: products need enough room for loading, removal and normal dimensional variation.
- Additional contents: carte, ribbons and tissue can alter the final closing height.
Worked fit example: A product is 30 mm high. It sits on a 6 mm insert platform and needs 2 mm of space above it. The layout therefore needs 38 mm of usable closed height. IL 2 mm is an illustration, not a universal clearance recommendation; the right allowance depends on the product, box structure and tolerance.
Don’t try to stop product movement by making every cavity tighter. Use support points that secure the product without scraping it or making removal difficult. See PackCCP’s mailer box insert design guide for practical insert configurations.
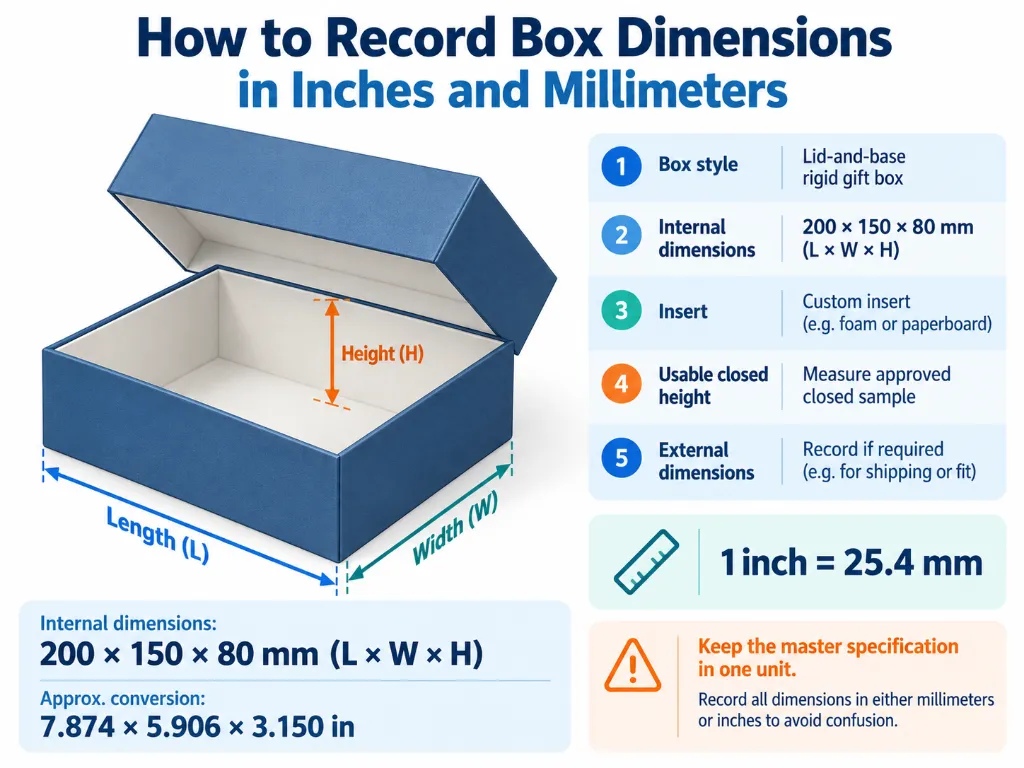
How to Record Box Dimensions in Inches and Millimeters
For projects across the U.S., Canada and Australia, utilizzo one master unit on the approved manufacturing drawing. Add an inch conversion for reference when needed.
1 inch = 25.4 mm.
A specification might look like this:
| Articolo | Recorded detail |
|---|---|
| Box style | Lid-and-base rigid gift box |
| Internal dimensions | 200 × 150 × 80 mm (L × W × H) |
| Approximate conversion | 7.874 × 5.906 × 3.150 In |
| Inserire | Paperboard tray; cavity size to be approved |
| Usable closed height | Verify with actual product and lid |
| External dimensions | Measure approved closed sample |
| Shipping parcel | Measure separately after final packing |
Keep the unrounded metric values for tooling and production. Apply the selected carrier’s rounding rules only when preparing shipping measurements. A labelled photo or drawing can prevent confusion when the box opens sideways or vertically.
How to Check Box Size and Fit Before Ordering Custom Packaging
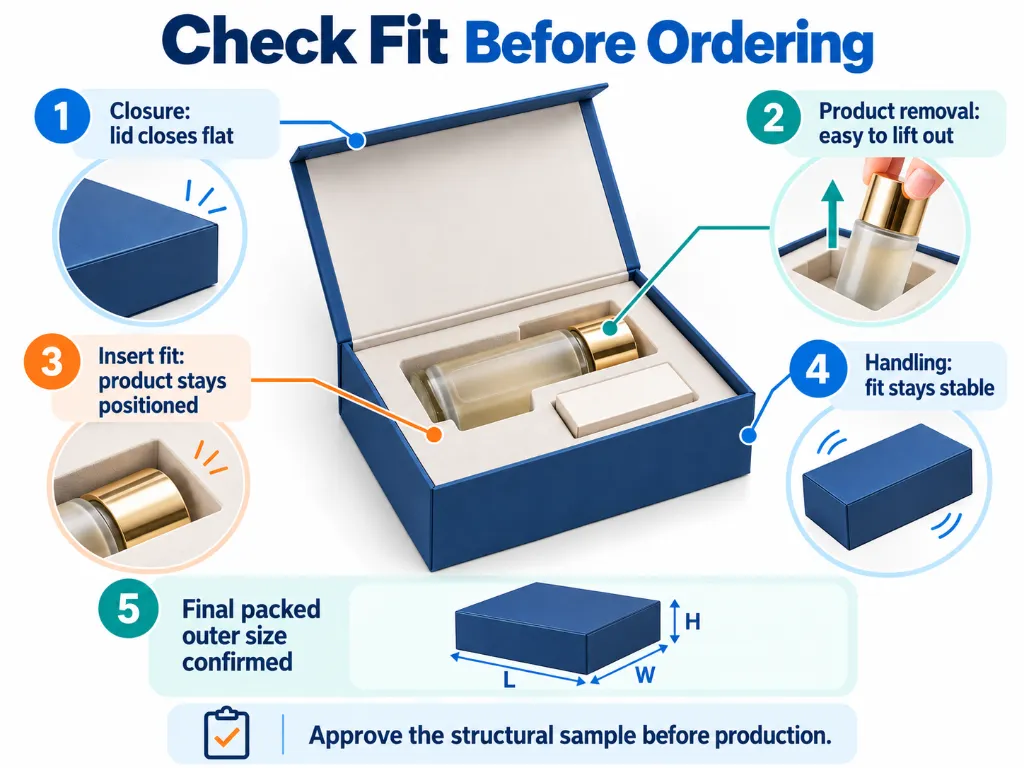
Load a physical structural sample with the real products, insert and printed materials. Check it as someone packing the order—and someone opening it—would.
- Chiusura: Does the lid close without touching the product or lifting at a corner?
- Product removal: Can a customer lift each item out without force or damage?
- Insert fit: Does the product stay positioned when the box is handled?
- Tray movement: Does a loaded drawer slide smoothly without excessive play?
- Coerenza: Does the fit still work with several product samples, not just one?
- Shipping pack: Do the final outer dimensions match the logistics plan?
A useful real-world example is PackCCP’s automotive display packaging project, which describes checking the rigid box, fitted insert, accessory compartment and final assembly as separate approval points. The case does not publish dimensional tolerances, so it should be used as an example of the review process rather than as numerical sizing evidence.
Once the fit is approved, record the final internal, external and cavity dimensions on the structural drawing. If you’re developing a new gift or mailer box, send PackCCP your product dimensions, preferred box style and insert layout to begin a sample review.